Kodi turns your Android smartphone or tablet into a multimedia center from which you can easily access all the content you keep on your Android, as well as access your files on the network or from the Internet. Here we tell you everything you need to know to install Kodi on your Android.
What is Kodi?
We tell you how to download and install Kodi, the free platform that will convert your tablet, smartphone or Android TV box into a multimedia center.
At first, it probably will not sound like anything if we tell you that Kodi is one of the best multimedia management systems for Android that exists, but if we tell you that Kodi is what a couple of years ago was XBMC , it is I’m probably going to sound a little more.
In addition to being one of the best multimedia applications for Android , Windows, Linux, macOS and a host of other platforms, Kodi is completely free and open source so you can enjoy its functions freely on any of your devices.
Kodi is an app that turns your Android into a multimedia center from which you can access all the audio, video and photo files. Kodi also allows you to add some add-ons that enhance the viewing experience by adding subtitles, covers or additional content from the Internet for your multimedia files.
Install Kodi on your Android from Google Play
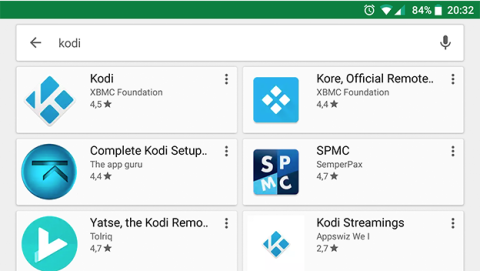
Installing Kodi on your Android can not be easier. You simply have to go to Google Play and perform a search with the term Kodi.
Make sure you choose the correct app since there are several apps related to Kodi, but they are not the official installer. Tap on the app created by XBMC Foundation and install it on your Android as you would with any other app.
Try to do it while you are connected to a Wi-Fi network because the app is a bit heavy.
When the installation is finished, you can start using the app to access all the multimedia content of your Android or the multimedia content that you share in your local network.
Install Kodi if your Android is not compatible with Google Play
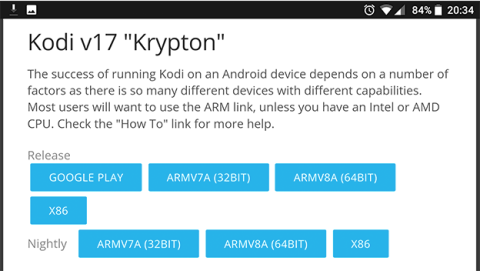
If your Android device does not have Google certification and, therefore, you can not access Google Play apps , you do not have to give up installing this fantastic app since you can download the Kodi installer APK file from their website official.
To do this, go to the Downloads section of the official Kodi website and look for the Android icon in the Current release download section , which indicates that in that section you will find the most current stable version for the different operating systems.
Next, select the type of processor architecture of your Android, depending on whether you use an ARM processor ,or an Intel x86, and the APK installer will be downloaded to your device. Do not try to install it yet.
Since the installer does not come from Google Play, before installing it you need to activate the Unknown sourcesoption .
Once activated this function, you can access the APK file you have downloaded on your Android device and install it.
Change the interface language
One of the first configurations that you should do after installing Kodi on your Android will be to change the interface language. That way, it will be easier to configure the other settings of the application.
To do so, just click on the gear on the top to access the settings section.
Next, go to the Interface Settings and Regional section . Then, tap Language and choose the appropriate language in the list. After this, the new language will be installed and the interface will be translated to the selected language.
Add content sources from the microSD
Managing the videos or music of your tablet on Android is one of the main virtues of Kodi, but to do so, you must first indicate where that content is stored.
Once the location of the multimedia files has been established, the program is responsible for cataloging and distributing them in its different sections: videos, series, music, photos, etc.
For example, you will only have to indicate that you keep your videos in a certain folder of the internal storage or of the microSD card of your Android and Kodi will automatically classify all the content found there.
To achieve this, you only have to touch the gear wheel at the top of the left side menu and touch in the Content settings section .
In the upper part you will find the section Content settings with the sections Videos , Music and Images . Touch on the type of content you want to add. For example, Videos .
Now, choose the microSD card , if you keep your multimedia content there, or Add videos if you save them in the internal storage of your Android.
In the first case, select the folder of the microSD that contains the videos you want to add and make a long press on it. In the box that appears, choose the Scan option for the collection .
Next, Kodi can detect what type of content you are adding (movies, episodes of a series, etc.) from their metadata. If they are not correct, you can always assign them manually.
To do this, repeat the same process and keep the folder containing your videos pressed until the pop-up menu reappears. On this occasion, choose the Change content option . Afterwards, a new box will be opened to establish what type of content you will add. Tap in the field This folder contains and chooses Movies , which in this case is the content of this folder, but you can choose other options if they adapt better to the content you want to add.
You can repeat this same process to add content to your collection in the rest of content categories such as music or images.
Add content from your Android’s internal storage
If you save the multimedia content in internal storage or lack microSD card, you can also tell Kodi where to look for your multimedia content.
To achieve this, tap the gear on the top left side menu and access the Content Settings section . Then, as in the previous section, choose the type of content in the Videos, Music and Images sections, but this time, choose the Files option . Then, choose Add … and a new box will appear.
Then, click on Search and decide where the content you want to add to Kodi is located. Despite what you may suggest, the External storage option corresponds to the internal storage of your Android. Tap on it and, once you have selected the appropriate folder, click on OK and the path of the folder will be added to the box.
In this same way you can add shared content in your local network. To do this you just have to select the UPnP Devices option when adding a new content source.
Set the way to show the content
After adding the content, it is cataloged and displayed in the respective content categories.
You can configure how you want each type of content to be displayed by accessing the viewing options for each category.
That way, it will be easier for you to identify your content and, with a single touch you can play it from the Kodi player that is compatible with most of the usual video, music and image formats.

